Introduction#
Hugo is a powerful static site generator that I have been exploring recently. Its simplicity and the speed with which it allows me to create and share content inspired me to start the blog you are reading.
In this article, I want to share an experiment born purely out of curiosity: to see whether it is possible to keep the GitHub repository with my website source code private while still publishing it via GitHub Pages, a service that normally requires a Pro account to deploy from private repositories.
This isn’t a real necessity for this personal project, but rather a desire to find an alternative solution using the tools at hand. After consulting a few outdated or incomplete articles, I arrived at the configuration that I will show you step by step below.
Creating the website#
Let’s start by creating a test website with Hugo and installing a theme via Git submodules. If you already have everything set up, you can skip to the next section:
- Create the directory for the website:
hugo new site mysite-source - Move into the directory created and initialize a local repository:
cd mysite-source git init - Create the site with Hugo and add a theme:
hugo git submodule add -b main https://github.com/nunocoracao/blowfish.git themes/blowfish - Remove Hugo’s default configuration and replace it with the one provided by the theme:
rm hugo.toml mkdir -p config/_default/; cp themes/blowfish/config/_default/* config/_default/ - Uncomment the line
# theme = "blowfish" # UNCOMMENT THIS LINEinconfig/_default/hugo.tomlfile: - Start the server and check that everything works correctly:
hugo server
If everything is configured correctly, you should see a page similar to the following:
Repository setup#
Now, you need to create two repositories on GitHub:
Private repository (
mysite-source): this is where we will store the site’s source code to keep it private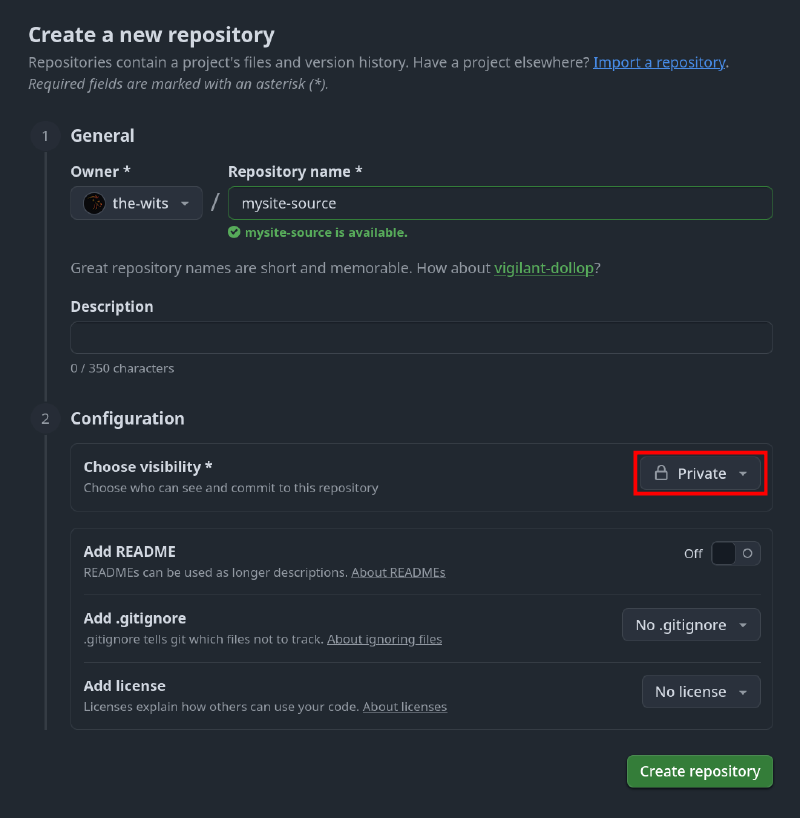
Creating private repository on GitHub Public repository (
mysite): this will hold the generated site code from Hugo, which will be published via GitHub Pages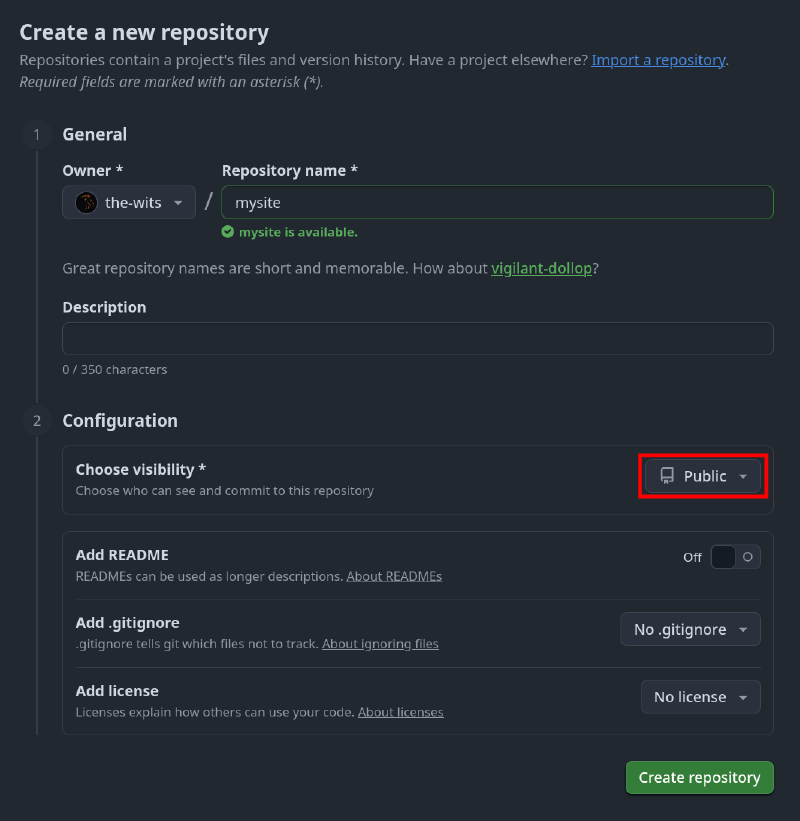
Creating public repository on GitHub
You can also use repositories on different accounts
The two repositories don’t need to belong to the same GitHub account: you can manage the private repository with one account and the public repository with another. For simplicity, this guide uses a single account, but the setup with two accounts works the same way.
From your local site directory, push the code to the private repository:
git remote add origin https://github.com/<username>/mysite-source.git
git branch -M main
git add .
git commit -m "first commit"
git push -u origin main
Creating a Personal Access Token#
After pushing your source code to GitHub, you need to create a Personal Access Token (PAT) to allow the private repository to access the public repository.
Give your PAT a name and restrict its access to only the public repository (mysite) created earlier: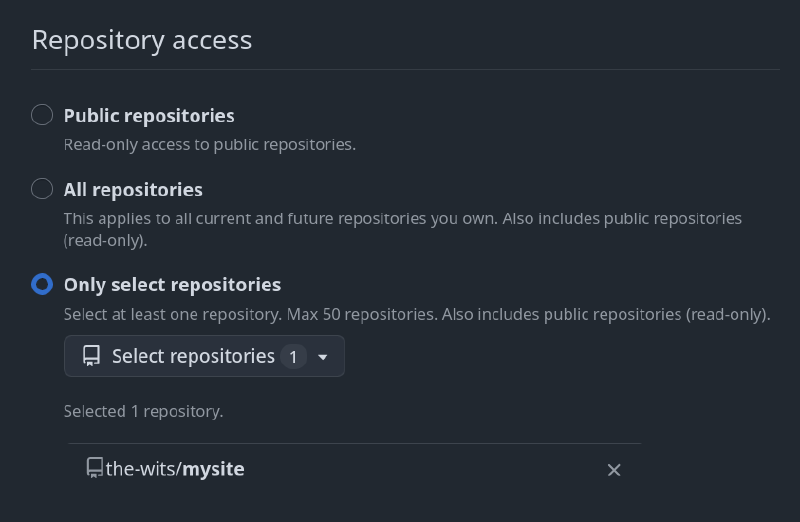
Before confirming the creation, make sure to assign the correct permissions to the token so that it can properly manage deployment to the public repository: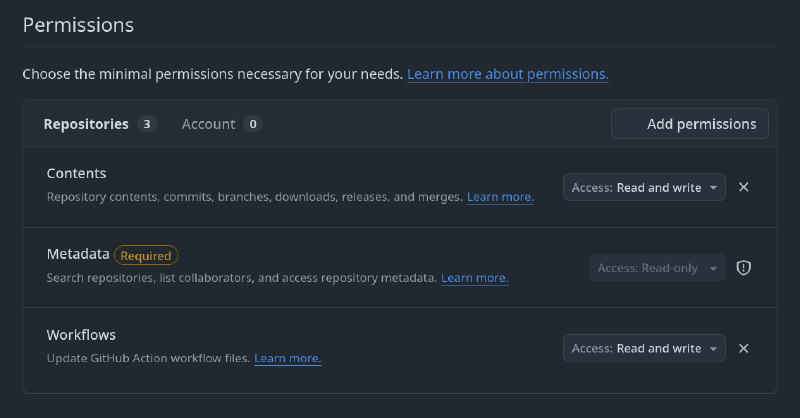
Confirm the creation, copy the generated token, and store it somewhere safe, such as a password manager.
Set the PAT as a Secret in the Private Repository#
After creating the PAT, you need to add it to the secrets of your private repository so it can be used securely during deployment.
From the private repository settings, you can add the token as a secret by following these steps:
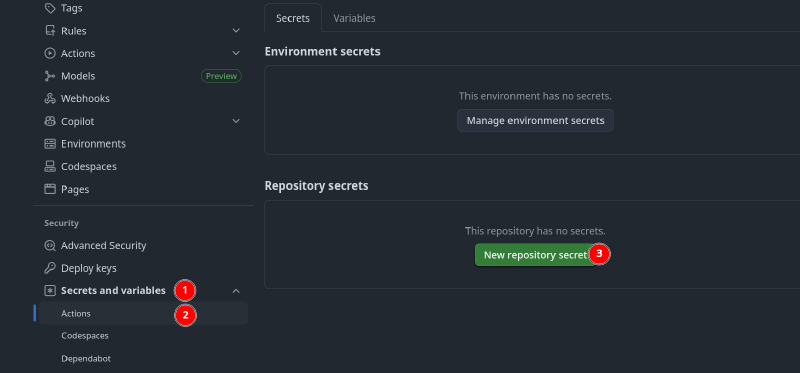
Add a new secret to the repository with the name BLOG_PAT_DEPLOY and paste the value of the token you copied earlier: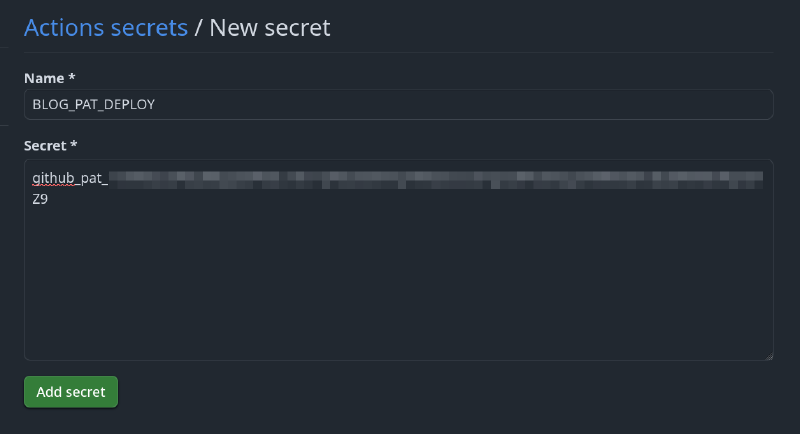
GitHub Action#
To create the following workflow, I based myself on the hosting and deployment guide of the Hugo theme I’m using (Blowfish) and other guides, such as Finisky Garden. Unfortunately, none of these fully addressed all the issues I encountered during deployment, so I thought it might be useful to share my workflow:
- Checkout: checks out the source code
- Setup Hugo: sets up the Hugo environment for the following steps
- Build: generates the static site to be published
- Deploy: uses the GitHub Pages deploy action to publish the website
Create the YAML file .github/workflows/gh-pages.yml in your site directory with the following content:
name: GitHub Pages

on:
  push:
    branches:
      - main

permissions:
    contents: write

jobs:
  build-deploy:
    runs-on: ubuntu-latest
    concurrency:
      group: ${{ github.workflow }}-${{ github.ref }}
    steps:
      - name: Checkout
        uses: actions/checkout@v3
        with:
          submodules: true
          fetch-depth: 0

      - name: Setup Hugo
        uses: peaceiris/actions-hugo@v2
        with:
          hugo-version: "latest"

      - name: Build
        run: hugo --minify

      - name: Deploy
        uses: peaceiris/actions-gh-pages@v3
        with:
          personal_token: ${{ secrets.BLOG_PAT_DEPLOY }}
          external_repository: the-wits/mysite
          publish_branch: gh-pages
          publish_dir: ./public
          single-commit: true
          commit-message: "Deploy from source code"
Modify the following fields in the workflow:
branches: - <branch_name>: set the name of the branch in the private repository that triggers the workflowpersonal_token: ${{ secrets.<PAT_NAME> }}: set the name of the secret you created earlierexternal_repository: <your-username>/<public-repo-name>: set your GitHub username and the name of the public repository where the site will be published
Publishing#
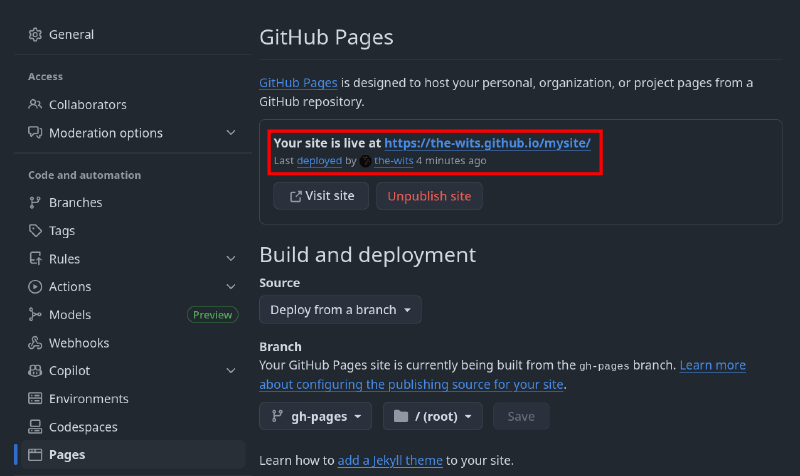
Add the workflow to your private repository and enable GitHub Pages in the public repository. In the repository settings, enable GitHub Pages to publish your website from the gh-pages branch: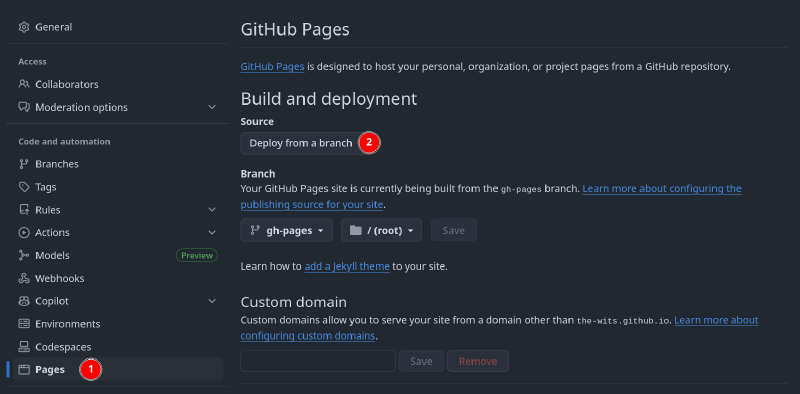
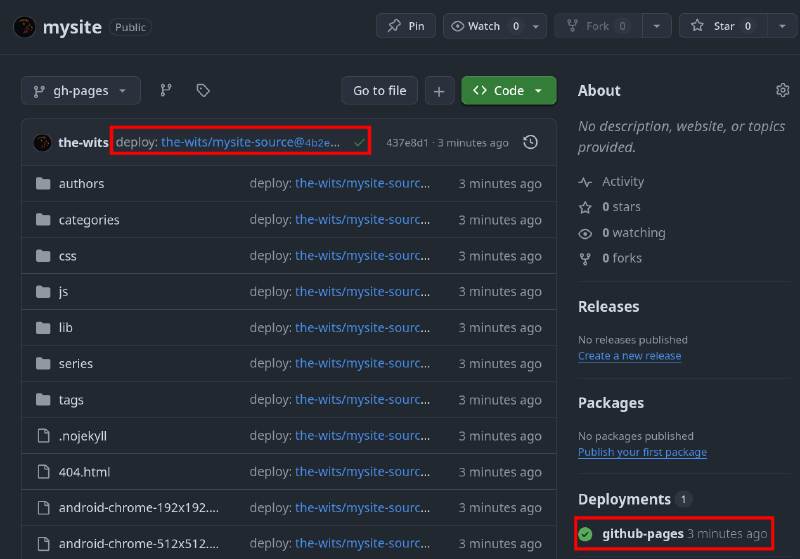
If everything is configured correctly, the workflow defined in gh-pages.yaml will be triggered. It will build the site with Hugo and publish only the static output to the public repository: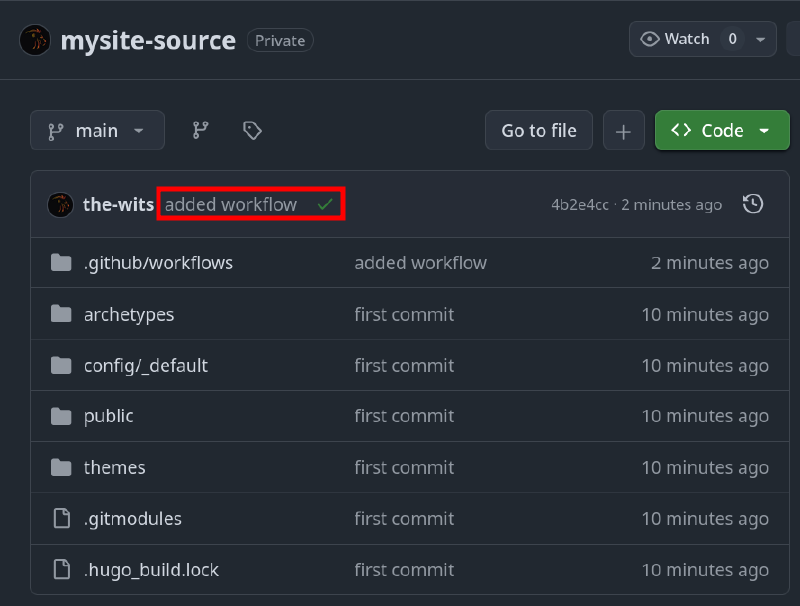
This issue is caused by the absence of the baseURL parameter in the site configuration. Add the line baseURL = "https://the-wits.github.io/" to the configuration file config/_default/hugo.toml as follows:
# config/_default/hugo.toml
# -- Site Configuration --
# Refer to the theme docs for more details about each of these parameters.
# https://blowfish.page/docs/getting-started/
theme = "blowfish" # UNCOMMENT THIS LINE
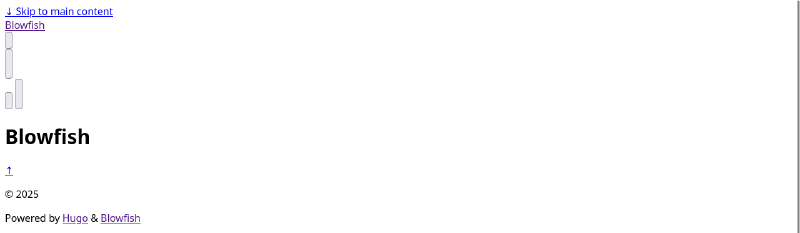
baseURL = "https://the-wits.github.io/mysite/"Save the changes and push them to the private repository. On each push to the main branch, the workflow will be triggered, and a few seconds later the site will be live: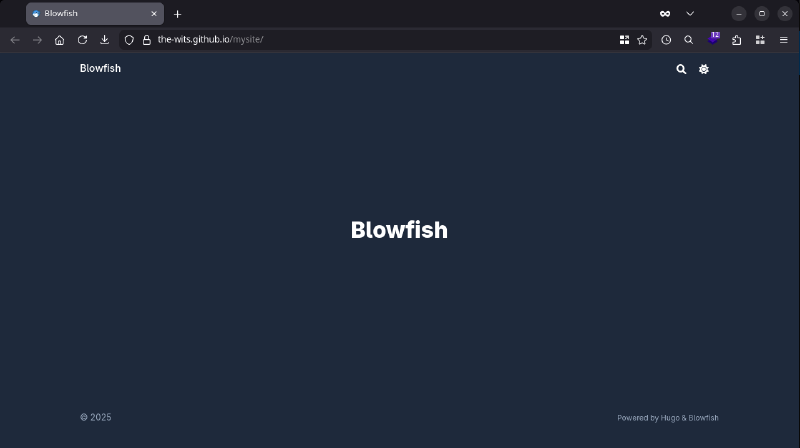
Custom Domain (Optional)#
GitHub Pages also allows you to set up a custom domain for your newly published website. If you want to add one, you can do so in the settings of your public repository: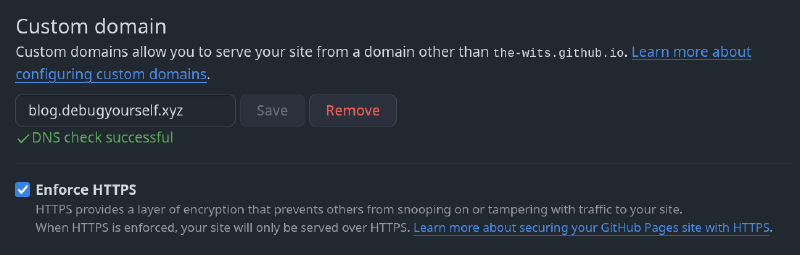
From your domain management panel, you’ll need to create a CNAME DNS record pointing to <your-github-username>.github.io (in my case, the-wits.github.io). Once the DNS record is added, GitHub will automatically verify the domain ownership.
During my tests, I encountered a frustrating problem: each time the workflow ran, it deleted the CNAME file created by GitHub to associate the custom domain with the site. As a result, the domain had to be manually re-verified after every deploy.
To prevent this, I created a CNAME file in the static directory of the project with the custom domain name.
The contents of the static directory are automatically copied to the root of the generated site and published to the gh-pages branch after deployment. This ensures that the CNAME file is restored on every deploy, fully automating the release of new content.
Troubleshooting#
- Make sure the workflow is located in the correct directory (
.github/workflows/):.githubmust start with a dotworkflowsmust be plural, with the s at the end
- Check that the branch specified in the workflow is correct. Every time you push code to that branch, the workflow will be triggered
- After setting a custom domain, you might not be able to immediately enforce HTTPS. In this case, it’s normal to wait a few minutes:
- When you add a custom domain, GitHub Pages needs to request an SSL certificate from a CA like Let’s Encrypt. This process is not instant and may take some time
- If the issue persists after several minutes, try re-adding the domain and repeating the DNS verification process